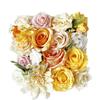
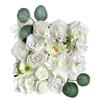
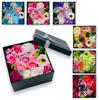
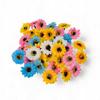
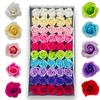
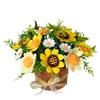
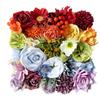
Flowers in a Frame - Colors of the World Product Specifications: - A set of elements for creating a 3D flower picture to hang or stand. The set includes a wooden frame with a back to which you glue the color-coordinated flower heads. The most effective way to glue them is using hot glue. The frame (edges) can be painted any color or left the natural pine color. Painting the edges a dark color will highlight the colors of the flowers. A ribbon is pinned to the frame (from the back) with thumbtacks and tied in a bow. - flower colors; pink, purple, yellow, orange, red, blue, green - dimensions of elements: frame - external dimensions 24.5 cm x 24.5 cm / internal dimensions 22 cm x 22 cm, flower heads: large 9 cm diameter, small 5 cm diameter, small flowers (the number of flowers is enough to completely cover the surface of the frame - the set includes all the heads shown in the visualization) - number of elements: 1 pc - frame, approx. 32 pcs - flower heads and green decorations, 1 pc - set of colored paints with brushes, small stand for mixing paints, 2 pcs - drawing pins, 1 pc ribbon, 2 pcs - thermal glue + small glue gun - weight: 1.2 kg - instructions with a photo showing a proposal for finishing the 3D picture - flower arrangement - material: wood, fabric, plastic - recommended age: 12+ (adult supervision) - difficulty level: 6/7 - product intended for: persons adults, boys and girls - application: decoration - supports the development of: manual skills, logical thinking, concentration, helps to relax - packaging dimensions (colored box): length 32 cm, width: 9.5 cm, height: 20.5 cm THE PRODUCT IS NOT A TOY WARNINGS: 1. Due to the high temperature of the hot glue gun used, the nozzle and glue must not be touched by hand. 2. Do not disassemble the hot glue gun on your own. 3. Do not allow a child to use the gun. 4. Store the gun in a safe place. USING THE GUN: 1. Prepare the work station - necessary lighting, scissors, a protective pad for the table (cardboard, paper - it cannot be foil due to working with high temperatures), paper towel. 2. Plug the gun into the power supply, insert the glue stick from the back. 3. Wait approximately 3-5 minutes for the gun to heat up. 4. Check the gun's operation and proper heating by pressing the button on the handle – glue should flow out slowly. 5. Spread the glue evenly, in small amounts, only on the surfaces to be glued. 6. After use, unplug the gun and allow it to cool. Do not remove the remaining glue stick from the gun.






 Товар из Польши


 Возврат по недоставке