【Voltage Compatibility】
When using electrical appliances, please note that they are designed for Japanese voltage specifications (90-110V), so if you use them with a different voltage, it may cause a malfunction.
【Plug Type】
Our products use Japanese plug types (A or B type).
Please use a conversion adapter if necessary.
【Important Note on Transformers and Adapters】
A transformer adjusts voltage to match your device’s requirements.
A conversion adapter only changes the plug shape and does not adjust voltage.
Using only a conversion adapter without a transformer may result in damage to the product.
【Liability】
We are not responsible for malfunctions or damages caused by improper use, such as operating the product without a transformer.
[About clocks that synchronize time via radio waves]
The function of clocks that synchronize time via radio waves only works in the Japanese area. Please be careful.
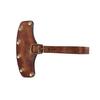
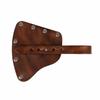
PU leather mirrorless single-lens camera bottom protective opening/closing jacket case - Compatible with Alpha α7 α7r α7s
Accessories: 2 fixing screws / LCD cloth
[Product description]
Synthetic leather mirrorless single-lens camera jacket case - Compatible with a7 (ILCE-7K) / a7r (ILCE-7R) / a7s (ILCE-7S) + 2 fixing screws.
*This is a "no brand/unstamped/compatible product" and is compatible only with the title model. Please be careful not to confuse it with sister models or other models with similar names.
【specification】
The exterior is PU leather, and the interior is lined.
There is also a plate built into the bottom to protect your camera.
I think it is an easy product to handle because it is designed to be relatively lightweight and can be worn without being affected by the attached lens.
【Features】
The bottom part is openable and can be replaced with the case attached.
At the same time, the back of the fixing screw also serves as a tripod hole, so you can use a tripod while wearing it.
In addition, the parts that are open to the outside (grip part/side part, etc.) are slightly movable, so the shape can be corrected by applying pressure. Although this is only a range of fine adjustment, please try it as appropriate if the fitting is not good.
(In that case, it is more effective to apply pressure with the device removed.)
[How to install]
This method involves lightly pressing the tripod hole on the main body of the device against the fixing screw set in the case and rotating the fixing screw with a coin, etc. to attach or detach the device.
Please keep in mind that attachment and detachment are not a one-touch operation.
(This part is very easy to lose, so please handle with care.)
【accessories】
・Fixing screws x 2
・LCD cloth
[Notes]
*At the beginning of use, the position of the fixing screw may be slightly misaligned and it may feel difficult to install, but this will gradually ease as the material stretches and the installation time passes.
*Due to the characteristics of the material, uneven coloring and small scratches may occur. Please be aware that the surface may be uneven.
Thank you for your understanding.


![Synthetic Leather Camera Case Fixing Screw X 2 with SONY Alpha A7 A7r A7s Mirrorless Camera Bottom Protective Jacket [No Brand] Compatible 7 7R](https://img.joomcdn.net/2e96f969eea71ba01eca5c45369d07bb1023480c_1024_1024.jpeg)
![Synthetic Leather Camera Case Fixing Screw X 2 with SONY Alpha A7 A7r A7s Mirrorless Camera Bottom Protective Jacket [No Brand] Compatible 7 7R](https://img.joomcdn.net/df5c8a939e76383a8ada759335fdc4a4ec3d9e59_original.jpeg)
![Synthetic Leather Camera Case Fixing Screw X 2 with SONY Alpha A7 A7r A7s Mirrorless Camera Bottom Protective Jacket [No Brand] Compatible 7 7R](https://img.joomcdn.net/d40a1355505ab9dd1013238329c783a6dbb00ee8_1024_1024.jpeg)
![Synthetic Leather Camera Case Fixing Screw X 2 with SONY Alpha A7 A7r A7s Mirrorless Camera Bottom Protective Jacket [No Brand] Compatible 7 7R](https://img.joomcdn.net/ee16fbe1879d5e2a2bdf7dd88b706ac7e26c166b_original.jpeg)
![Synthetic Leather Camera Case Fixing Screw X 2 with SONY Alpha A7 A7r A7s Mirrorless Camera Bottom Protective Jacket [No Brand] Compatible 7 7R](https://img.joomcdn.net/25eb279351c450b4bb2c08b457c231396ceca489_original.jpeg)
![Synthetic Leather Camera Case Fixing Screw X 2 with SONY Alpha A7 A7r A7s Mirrorless Camera Bottom Protective Jacket [No Brand] Compatible 7 7R](https://img.joomcdn.net/e141f5181bb0706eceb9fbd726ede7b2666b7b4e_original.jpeg)
![Synthetic Leather Camera Case Fixing Screw X 2 with SONY Alpha A7 A7r A7s Mirrorless Camera Bottom Protective Jacket [No Brand] Compatible 7 7R](https://img.joomcdn.net/08f2b66584c2d57331e3e1cb2721074c302da00a_original.jpeg)
![Synthetic Leather Camera Case Fixing Screw X 2 with SONY Alpha A7 A7r A7s Mirrorless Camera Bottom Protective Jacket [No Brand] Compatible 7 7R](https://img.joomcdn.net/9b17102dd2dec7a884238f200b519b76c25fd56b_original.jpeg)
![Synthetic Leather Camera Case Fixing Screw X 2 with SONY Alpha A7 A7r A7s Mirrorless Camera Bottom Protective Jacket [No Brand] Compatible 7 7R](https://img.joomcdn.net/e032e69da083960a5481ebf9b82fdcbbfccfb9dd_original.jpeg)

![Synthetic Leather Case with Special Hardware Compatible with FUJIFILM FUJIFILM FUJI XT50 Bottom Protective Jacket Cover [No Brand] - X-T50 /](https://img.joomcdn.net/42b1f262c276623ecabd23af18ad49474dbb9642_100_100.jpeg)


![Camera Body Case Brown [Camera.Hirano] H-leica-m6](https://img.joomcdn.net/52d719a70d18afe44b340f620c7a35d65d14d016_100_100.jpeg)


![Synthetic Leather Digital Camera Case Compatible with RICOH GR3x GR3 RICOH Storage Protection Pouch [No Brand] - / GRx GR (light Brown) [Item]](https://img.joomcdn.net/8e6db4f631fb4cf8968d4d814cd493aa711c2c3c_100_100.jpeg)

![Synthetic Leather Digital Camera Storage Protective Case Compatible with SONY Sony DSC WX800 HX99 WX500 [No Brand] - Cyber-shot DSC-WX800 DSC-HX99](https://img.joomcdn.net/ace337373110a3172983e48d0c02c305c18e6c61_100_100.jpeg)

![[TECART] Honda Motorcycle Key Case Key Cover Key Chain Honda MONKEY125 CT125 HUNTER Cub CT110 Dax125 Smart Key Case Handmade Light Leather Hand S](https://img.joomcdn.net/73045be6037d9f00c8ef56525d79cf3223fbb9bc_100_99.jpeg)

![Synthetic Leather Digital Camera Case SONY Sony DSC RX100 RX100M2 RX100M3 RX100M4 RX100M5 RX100M6 Compatible with RX100M7 [No Brand] - Cyber-shot](https://img.joomcdn.net/10c124560846089c8a2f6dfbf6a7656c7a0e059a_100_100.jpeg)


